|
Panavia
Tornado GR4 |
|
RAF Hercules C-130 |
|
Qinetiq Alpha Jet |
|
| |
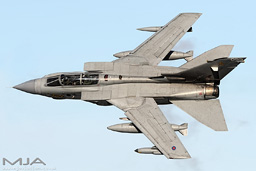
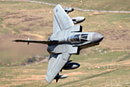
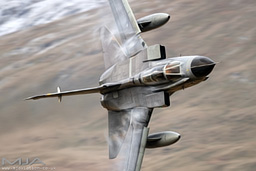
Panavia Tornado GR4 from RAF Marham shot from the
Bwlch Exit in the Mach Loop.
© All rights reserved
Shot
uploaded on Jan 25, 2011
|
|
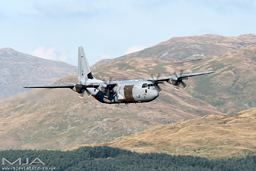
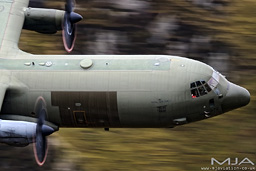
RAF Hercules C-130 heading in for the Cad Pass in
the Mach Loop.
© All rights reserved
Shot
uploaded on Jan 25, 2011 |
|
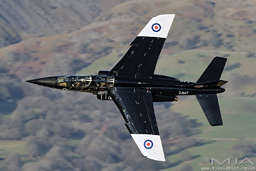
Qinetiq Alpha Jet from Boscombe shot from the Bwlch
Exit in LFA7 (Mach Loop).
© All rights reserved
Shot
uploaded on Jan 25, 2011 |
|
|
|
Panavia
Tornado F3 |
|
RAF Chinook |
|
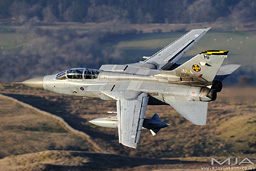
Panavia
Tornado GR4 |
|
|
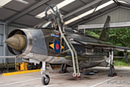
Tornado F3 makes a rare appearance at the Bwlch Exit
on a late January afternoon.
© All rights reserved
Shot uploaded on Jan 25, 2011
|
|

RAF Chinook flying very low through the Bwlch Exit
in the Mach Loop.
© All rights reserved
Shot
uploaded on Jan 25, 2011 |
|
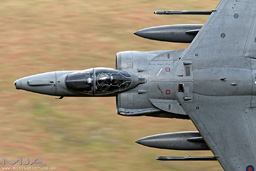
Panavia Tornado GR4
shot from Cad West.
Shot using a Nikon D300 & 300mm f2.8.
© All rights reserved
Shot
uploaded on March 1, 2010 |
|
|
|
Panavia
Tornado GR4 |
|
Panavia
Tornado GR4 |
|
Panavia
Tornado GR4 |
|
|
Panavia Tornado GR4 from RAF Marham shot from the
Bwlch Exit in the Mach Loop.
© All rights reserved
Shot
uploaded on Jan 25, 2011
|
|
Panavia Tornado GR4 from RAF Marham shot from the
Bwlch Exit in the Mach Loop.
© All rights reserved
Shot
uploaded on Jan 25, 2011 |
|
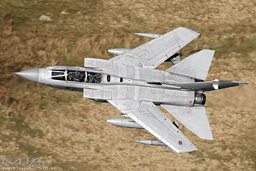
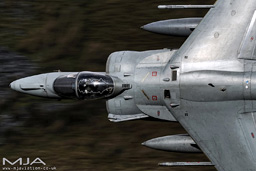
Panavia Tornado GR4 from RAF Marham sweeps its wings
back at the Bwlch Exit.
© All rights reserved
Shot
uploaded on Jan 25, 2011 |
|
|
|
RAF Hercules C-130 |
|
BAe Harrier GR9 |
|
BAe Harrier GR9 |
|
|
Hercules C-130 at Cad West in the Mach Loop. My last
trip up the hills for 2010.
© All rights reserved
Shot
uploaded on Dec 18, 2010
|
|
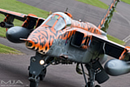
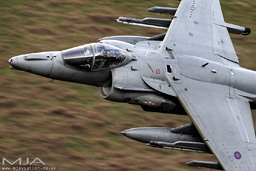
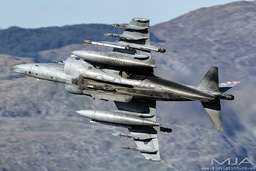
BAE
Harrier GR9 at the Bwlch's lowest ledge. Shot using a Nikon D3
and 600mm lens.
© All rights reserved
Shot
uploaded on Dec 18, 2010 |
|
BAE
Harrier GR9 at the Bwlch's lowest ledge. Shot using a Nikon D3
and 600mm lens.
© All rights reserved
Shot
uploaded on Oct 29, 2010 |
|
|
|
BAe Harrier GR9 |
|
USAF F-15E Strike Eagle |
|
Panavia
Tornado GR4 |
|
|
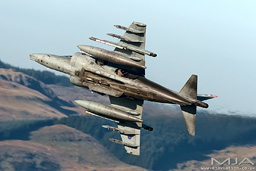
BAE
Harrier GR9 at the Bwlch's lowest ledge. Shot using a Nikon D3
and 600mm lens.
© All rights reserved
Shot
uploaded on Oct 29, 2010
|
|
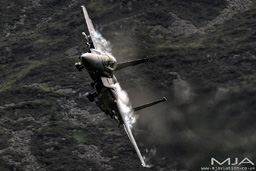
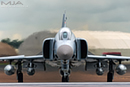
United
States Air Force F15E Strike Eagle at Corris Corner in the Mach
Loop (LFA7).
© All rights reserved
Shot
uploaded on Jan 25, 2011 |
|
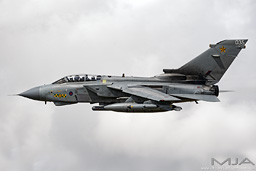
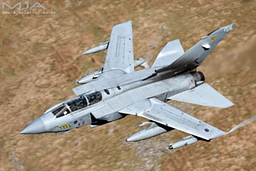
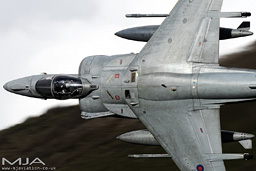
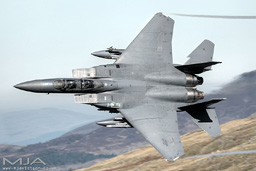
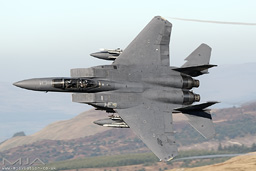
Tornado GR4 from RAF Marham shot from the Bwlch Exit
in the Mach Loop (LFA7).
© All rights reserved
Shot
uploaded on Jan 25, 2011 |
|
|
|
Panavia
Tornado GR4 |
|
BAE
Harrier GR9 |
|
BAE
Harrier GR9 |
|
|

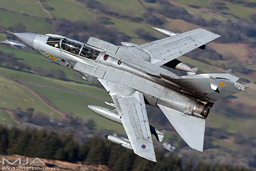
Panavia Tornado GR4 from RAF Marham heads in for Cad West in the
Mach Loop.
© All rights reserved
Shot
uploaded on Jan 25, 2011
|
|

BAE
Harrier GR9 at the Bwlch's lowest ledge. Shot using a Nikon D3
and 600mm lens.
© All rights reserved
Shot
uploaded on Oct 29, 2010 |
|
BAE
Harrier GR9 at the Bwlch's lowest ledge. Shot using a Nikon D3
and 600mm lens.
© All rights reserved
Shot
uploaded on Oct 29, 2010 |
|
|
|
BAE
Harrier GR9 |
|
USAF F-15E Strike Eagle |
|
USAF F-15E Strike Eagle |
|
|
BAE
Harrier GR9 at the Bwlch Exit. Shot using a Nikon D3 dSLR
and 600mm lens.
© All rights reserved
Shot
uploaded on Oct 24, 2010
|
|
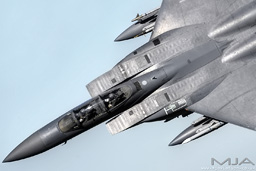
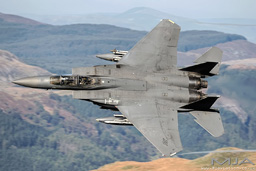
USAF F15E Strike Eagle at the Bwlch Exit.
Shot using a Nikon D3
and 600mm lens.
© All rights reserved
Shot
uploaded on Oct 24, 2010 |
|
USAF F15E Strike Eagle at the Bwlch Exit.
Shot using a Nikon D3
and 600mm lens.
© All rights reserved
Shot
uploaded on Oct 24, 2010 |
|
|
|
Dominie |
|
Dominie |
|
USAF F-15E Strike Eagle |
|
|
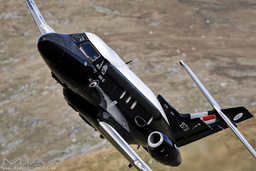
Dominie at the Bwlch Exit. Shot using a Nikon D3 dSLR
and 600mm lens.
© All rights reserved
Shot
uploaded on Oct 24, 2010
|
|
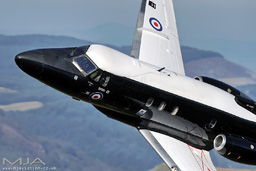
Dominie at the Bwlch Exit. Shot using a Nikon D3 dSLR
and 600mm lens.
© All rights reserved
Shot
uploaded on Oct 24, 2010 |
|
USAF F15E Strike Eagle at the Bwlch Exit.
Shot using a Nikon D3
and 600mm lens.
© All rights reserved
Shot
uploaded on Oct 24, 2010 |
|
|
|
BAE
Harrier GR9 |
|
USAF F-15E Strike Eagle |
|
USAF F-15E Strike Eagle |
|
|
BAE
Harrier GR9 at the Bwlch Exit. Shot using a Nikon D3 dSLR
and 600mm lens.
© All rights reserved
Shot
uploaded on Oct 24, 2010
|
|
USAF F15E Strike Eagle at the Bwlch Exit.
Shot using a Nikon D3
and 600mm lens.
© All rights reserved
Shot
uploaded on Oct 24, 2010 |
|

USAF F15E Strike Eagle at the Bwlch Exit.
Shot using a Nikon D3
and 600mm lens.
© All rights reserved
Shot
uploaded on Oct 24, 2010 |
|